justin
Junior Member
 
Posts: 60 
|
Post by justin on Dec 20, 2015 7:00:37 GMT -5
i dont know anything about astig. the projector is now in my spare room and i reset all midpoints to default (deleted all memory of my previous convergence settings.)
i never touched the astig as i didnt understand it. i didnt have sharp edges. i had a reasonably sharp center though.
i have since watched this video on youtube "A to Z, Sony VPH 1292 CRT projector alignment how to";
^ i learnt a few tricks from this. i am going to drag the projector back out tomorrow for another crack at calibrating.
|
|
|
|
Post by Casethecorvetteman on Dec 20, 2015 7:17:45 GMT -5
Four screws and the side panel is off, then there is holes to access the quad nuts. Theyre a prick of a thing to remove at the best of times, but Barco sets are the best for parts in and out, very easy to swap boards. The quad and splitter are the only items that are a pain in the arse, especially while the set is on the ceiling, because the splitter has soldering involved, which takes some significant talent to do upside down.
The outer clear sheath is there to protect the HV lead from damage more so than anything else, it stops the lead rubbing against gromets etc within the set, apart from that it serves no real purpose. Its dielectric properties have no hope of stopping 34.5kV from leaking through.
The black shit in the quad is potting compound, inside there is a bank of capacitors, and a few other items, but nothing servicable, so dont ever attempt to pull it apart unless its known dead and youre curious, its just a waste of time.
Have a look at the EHT board too, down near the edge connector there is an inductor wrapped in heat shrink ( left side as you hold the board in your hand, parts side up, edge connector toward your body ) ive seen that part fail before, and itll look like its been very hot and the heat shrink will be brittle. If its like that, it needs to be replaced. Yours may be fine, but look anyway, its easy to spot.
The quad does look fine, but then again they generally do. Hard to see where they arc, and id reckon the metal mounting plate is one spot they do arc, youll never see it there. It is well worth your while contacting Greg and getting yourself a spare quad and splitter, he has brand new ones. DO NOT buy a used one. Youve been warned.
At this point we are no further than general speculation based on my own experience with 2 sets, and these visual check may indeed yield no results. That isnt a bad thing, because i reckon looking to these areas is worth the little bit of time spent.
Once you clear these items, put it all back together and fire up the set with that rear cover open, black meter probe to the chassis, red meter probe to the test point on the SMPS, it looks like a little metal hoop about 5mm high off the board, black plastic sheath around it below the little hoop. Post the result there, go into menus and select genlocked pattern, picture tuning, colour balance, then pick WHITE, you should have a full white screen. Test for 17.3v with that up. If its low, we'll move forward from there, if its 17-17.4v, its fine, turn off the white pattern and watch the voltage rise for about 10 seconds, if it goes way up, we'll address that. If you dont have a meter, you can use the voltage menu in the service header, but youll need an external pattern for that.
Might even be worth posting a pic of that menu for me with a full white screen ( wait 20-30 seconds for stable figures after white ) then full black, wait 20-30 seconds after going full black before getting the pic.
|
|
|
|
Post by Casethecorvetteman on Dec 20, 2015 7:21:29 GMT -5
casey, this noise i see is like a blotch of streaking or smearing? its transparent. it is smudging the output (whatever i display.) you know what, it very well could just be as you describe! astig is the corner adjustment? is that correct? its on the sides and is about an inch wide on either side. and in the middle at the top of the tube face too about an inch wide. Astig is done mechanically via the 6 rings near the neck board. Then electronically via the menus. |
|
|
|
Post by Casethecorvetteman on Dec 20, 2015 7:29:11 GMT -5
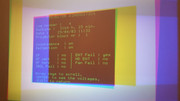
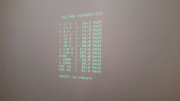
justin Avatar Dec 20, 2015 21:50:32 GMT 10 justin said: oops these replys happened while typing my reply. okay! i had to remove the eht (didnt know it was that at the time) to get to the quad anyway. i had a look at it and it looked fine. i just downloaded the barco documentation from the pinned thread. i now know which board is which. the picture i put up earlier with the corrosion, that was from smps1. smps2 looks fine. i dont know where to place the voltmeter to read 17v casey? i looked at the internal diagnostic page that output voltage the other night and took a photo. i understand this is not what you are describing i need to do. also, i dont know anything about astig. i never touched it. i read through my user manual i need to turn those nuts on top of the lenses? correct? My reply below!! SMPS2 isnt something ive ever heard of failing. Those pics, is the live voltages or did you press enter to see what the stored data was on the failure? and that EHT FAIL at 2,829 hrs 20mins, how long ago was that? How many hours on now? |
|
justin
Junior Member
 
Posts: 60 
|
Post by justin on Dec 20, 2015 8:07:34 GMT -5
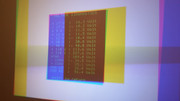
okay well shite! i just lost a couple years off my life. i found that hoop on the smps no worries. tested my voltmeter on a battery to make sure it was working correct. stuck the negative on the chassis and touched the hoop. what happened next i was not expecting...!! a small spark came off the hoop and shut down the set. it came back on and turned off twice more before i could pull the power from the wall. i hesitantly inspected the rear and no smoke or anything visible. i then plugged it back in and the set started up just fine. f***ing paranoid i nuked something, i just went through some menus and waited a while. all seemed good? touch wood. i took quite a fright lol...! i decided to use the internal menu and apply a full white and full black after that. below are the results (also shows the sets current hours.);    3164h, 20m is the sets current mileage. that log with eht fault was some 335h ago? is that correct? |
|
justin
Junior Member
 
Posts: 60 
|
Post by justin on Dec 20, 2015 8:18:00 GMT -5
okay i looked at the eht again (i did come across your thread for the wobbly horizontal image, where you later found the fried inductor, but didnt know it was on the eht board.) i looked at the inductor and it looked fine (quite clean on one side, the other had a buildup of dust on the heat wrap.)
|
|
|
|
Post by Casethecorvetteman on Dec 20, 2015 8:45:39 GMT -5
The dust is no big deal, just wipe it clean.
Those voltages look to be stored static figures, you need to find the live voltages menu, its not accessed through the event logs.
I dont know why it work spark, unless you had the meter set on ohms, it should be on voltage scale. If set to ohms, youre putting a dead short across the 17v line. I cant recall if there is just one measuring point there, ill go and pull mine out and look.
|
|
|
|
Post by Casethecorvetteman on Dec 20, 2015 8:53:25 GMT -5
Where my finger is:  The pot to adjust 17v level is near the other end, blue body, white screw. |
|
justin
Junior Member
 
Posts: 60 
|
Post by justin on Dec 20, 2015 9:15:17 GMT -5
thanks casey. i definately had it set to read volts dc. i was just trying different measurements on the meter and its not right. i will have to pickup another from jaycar tomorrow to measure this hoop.
where you are pointing, thats where i measured from. this meter has been in the garage toolbox for some time. it should have been fine. not sure whats happened with the arcing.
clearly the set shut down to prevent damage. but could something else have let go? i know you'd only be guessing.
speak soon
|
|
|
|
Post by Casethecorvetteman on Dec 20, 2015 9:19:27 GMT -5
No idea mate, but you never know with cheap meters, i dont trust them as far as i can throw them. I used only Fluke or Brymen when i was still in the trade, but im not going to expect youll lash out $300 on a good meter.
|
|
Deleted
Deleted Member
Posts: 0
|
Post by Deleted on Dec 21, 2015 1:09:26 GMT -5
About the noise you could trouble shoot a little. Does it get worse when you use a lot of convergence? Could also be something in the controller I would try delete all memories.
|
|
justin
Junior Member
 
Posts: 60 
|
Post by justin on Dec 21, 2015 2:09:07 GMT -5
redfox, i managed to make the smered image clear up in the bottom left side of the red tube (however, bottom right and top are the same still.) i used the manual astig adjustments on the back of the neck. theres fine blue marks where i presume the handles are supposed to line up?
theres two adjustments on each handle. i can swing it around the tube and then i can twist the handle.
after watching the video mentioned earlier, i understand astig is just making the dot on the test pattern displayed round. i have some serious flaring going on around the entire final image. what i cant wrap my head around is what i am supposed to do. my understanding is to get all mechanical adjustments as close as possible, and use midpositions for all electronic settings before i begin calibrating electronically. if i use electronic astig through the menus, it says to use the focus control on the remote to defocus the image. i dont understand why i do this. am i supposed to get the center astig perfect with mechanical handles? then use digital adjustments to fix the rest of the image?
i am struggling here. curts page about astig is confusing :S
|
|
justin
Junior Member
 
Posts: 60 
|
Post by justin on Dec 21, 2015 2:14:34 GMT -5
i spent an hour making a portable cabinet for the projector (so i can use it more frequently until it gets a permenant mount.) the guy on the left isnt much help!   |
|
|
|
Post by Casethecorvetteman on Dec 21, 2015 2:24:11 GMT -5
If the astig is out, youll get bad flaring like that, it takes a bit of practice to get it right.
|
|
justin
Junior Member
 
Posts: 60 
|
Post by justin on Dec 21, 2015 2:47:10 GMT -5
okay. i feel like when calibrating i need a fresh set of prescription glasses. i find myself squinting alot looking for the 'best' range of adjustment.
anyway, i am trying to fix the corner focus and turning the nuts on the scheimpflug feel dicey as. i feel like i am going to snap something?
|
|