|
|
Post by justgreg on Mar 31, 2014 15:32:25 GMT -5
Hi SC. It's great to see you!
Not sure if you remember my experience with Sony pj's years ago; an experience that soured me to Sony since....until I saw a youtube vid of the pj you're fixing. The black levels and detail I saw are compeling reasons to rethink my prejudice.
To follow along with your efforts I found a SM but unfortunately the pdf gaks before I can get to the circuit component level portion and I can't find another one that works. What little I could access there are a lot of references to rewriting/flashing. Have you gone that route yet?
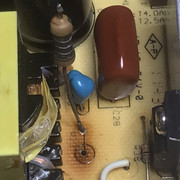
Based on the pics of the test pattern I was hoping to be able to look into what controls the convergence, even though digital is probably very much unlike CRT where all my experience lies.
|
|
|
|
Post by justgreg on Mar 31, 2014 15:10:33 GMT -5
I thought it was only luggage that went on road trips like that.  Looking forward to the results after you get them installed. |
|
|
|
Post by justgreg on Mar 30, 2014 22:27:18 GMT -5
Anything new to report?
|
|
|
|
Post by justgreg on Mar 27, 2014 13:56:02 GMT -5
Ahhhhh...that explains it. The rule of thumb I've learned is that when one is replaced they both should be done at the same time. Is replacing the other next Nash?
|
|
|
|
Post by justgreg on Mar 26, 2014 11:08:06 GMT -5
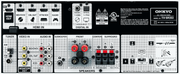
Wow...I'm really surprised the IPM's are blown already. You had a bad fuse right up until just recently and still apparently have an issue that's preventing the set from staying on without codes so...how badly is the design/flow of the overall circuitry that the IPM's can be in jeopardy?? Can't wait to see what the problem ends up being. It would be nice to be able to follow along with schematics but even you can't get your hands on them.
|
|
|
|
Post by justgreg on Mar 25, 2014 21:32:16 GMT -5
March 25th and still working BUT...I think I'm detecting a loss of low frequency. If I lose all LFE and/or all audio again I'll have no choice but to completely remove the DTS chip and reball it. If that happens I won't generate another procedure but will just add a link to an excellent youtube vid someone else has already made. I'm not adding it now because this sticky is all about DIY reflowing whereas reballing requires higher level equipment not generally found in a DIY-ers toolbox. EDIT: 3/30/14 Man is my face red. Turns out I had NO LFE, not just diminished. I found the 'solution' after retrieving my dogs ball where she dropped it in the corner near the sub. And the reason?...we lost power in the house a week ago before I noticed poor bass output and the surge protector powering the sub had delatched as part of it's protect mode. When the coupling relay lost power the sub of course was without mains. I poked the power button with my cane and 'voila...  The most important thing however is that my DIY BGA reflow is still holding. |
|
|
|
Post by justgreg on Mar 25, 2014 21:24:24 GMT -5
The set will go into protect mode while adjusting voltages if you go too far. I thought I bricked my Insignia plasma when adjusting voltages but just pull the mains plug and wait a few seconds and plug back in. If it won't come on after that visually adjust the pots to midpoints and unplug/replug and try again.
I don't think you cooked your new IPM's. That isn't based on anything in particular but just that I learned they're quite robust and can withstand regular significant power-on voltage surges quite well, but don't handle their own generated heat very well. The passive heat sinks are woefully inadequate for the job which is why I added fans to mine.
At least once you do get it running you'll have a good display with excellent CR and image quality. I'm screwed with my set because I can't find a jig to flash the firmware to fix the mal-discharge and sparklies.
Anyway, while I'm bedridden and can't get my fingers into anything I've really been enjoying following this thread!
|
|
|
|
Post by justgreg on Mar 17, 2014 11:04:30 GMT -5
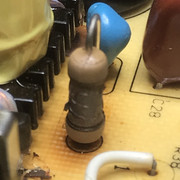
Was thinking the same thing myself. Now you have a better pic of it I can see the missing eyelet.
So you don't have a datasheet for the IPM's? It took some haggling with the ebay seller to get the info for the IPM's I used but I also got lucky because the pins were all clearly marked on the board.
|
|
|
|
Post by justgreg on Mar 17, 2014 9:08:17 GMT -5
Crap!
|
|
|
|
Post by justgreg on Mar 16, 2014 10:19:19 GMT -5
Hey Nash I forgot to ask and cam't remember if you already said what your repair plan is bit...are you going to replace both IPM's?
|
|
|
|
Post by justgreg on Mar 16, 2014 0:32:36 GMT -5
I remember doing mine and like most things done for the first time I learned better ways after I was already commited to doing it one way.
Super heating with an industrial heat gun is the best way to approach these IPM's because the board is pretty thick...something like .055" IIRC. It can take a lot of heat. An electric desoldering vac sucker makes it even easier but a spring loaded sucker works ok too. Don't waste the time or money for wick...doesn't work well at all.
It was a bear to replace but I wouldn't mind tackling a similar repair again just to use what I learned from hindsight. You've achieved good clean solder removal so far though.
While you have it all apart you might want to source 12vdc fans to mount on the heatsinks. Just make sure the cabinet cover will fit over whatever ones you settle on.
I wouldn't worry about the eyelet. It's still there and connected. It should solder up fine. It's gonna take a high wattage soldering iron to flow through that thick PCB too. Too low wattage and it'll take longer to get a good joint and will end up sending more heat to the delicate internals of the IPM. (You knew all this I know but thought I'd just include things for those who've never worked with something like this).
|
|
|
|
Post by justgreg on Mar 15, 2014 23:57:29 GMT -5
March 15th and still working.
|
|
|
|
Post by justgreg on Mar 15, 2014 23:40:39 GMT -5
Welp....the patient survived, now the wait and see to find out if it all worked.
I wanted my wife to bring a bed tray with my meter and the power supply but she won't hook me up. lol I'm friggin dying to test the next step you sent Mac. I guess it won't go anywhere but all this lying around is driving me bat$hit.
To make things worse, my bedroom TV is the 42" Insignia plasma I replaced caps and IPM's in that still needs a firmware update to fix sparklies and mal-discharge so got that needling me. lol
Thanks for the nice thoughts guys! Catch ya 'round as I can.
Greg
|
|
|
|
Post by justgreg on Mar 5, 2014 13:58:07 GMT -5
No, nothing. There's no hurry on this...just something I needed to keep myself busy.
I most probably won't be able to get back to this for a week or two (hopefully) after today because tomorrow morning is spinal fusion surgery. *sigh*
Thanks Mac and I'll talk again when I can get back to this.
|
|
|
|
Post by justgreg on Mar 4, 2014 17:11:05 GMT -5
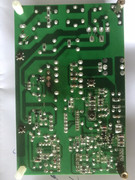
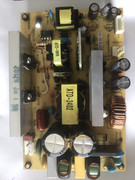
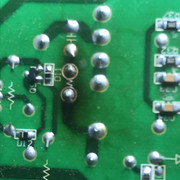
If you look at the pic of the top down shot, bottom left corner, there's a closed eye ground lug there. That's the neg I used. That said, I got nothing off the circled pins. I played a little and tested other variations but still got doughnut holes.
I checked voltage at the bridge rectifier with the neg lead on the ground lug and got 115v AC off all 4 legs if that means anything.
|
|


 The most important thing however is that my DIY BGA reflow is still holding.